
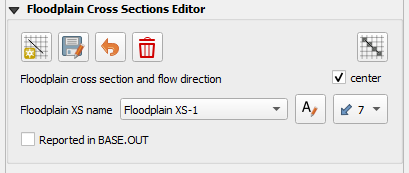
Floodplain Cross Section Editor#
The floodplain cross section editor is used to set up the FPXSEC.DAT file. This section will describe how to digitize and schematize the data.
Map Velocity#
Run the model to produced results.
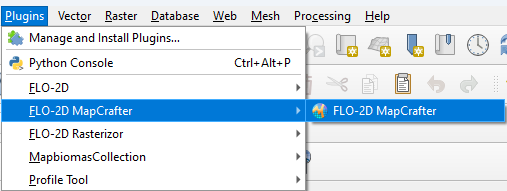
Use MapCrafter to map the velocity vectors before creating floodplain cross sections.
Connect to the output data.
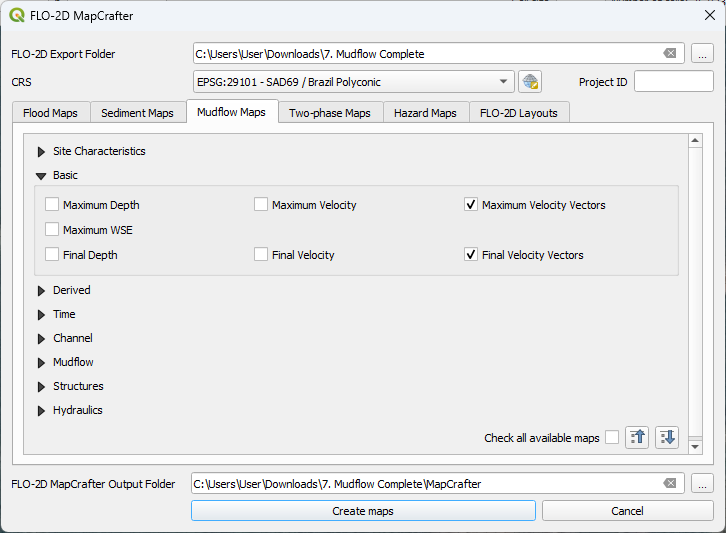
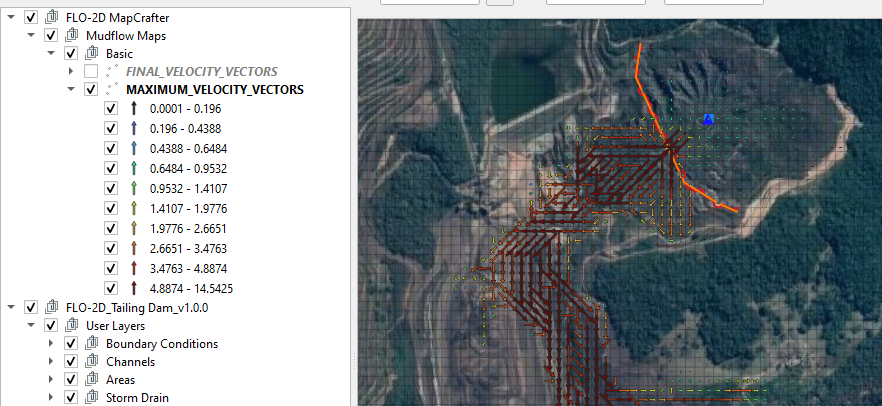
Load the Velocity Vector Maps.
If necessary, change the style of the velocity vectors.
Open the properties of the Vector map.
Click the SVG button.
Unlock the Aspect Ratio.
Set the width to 2 mm.

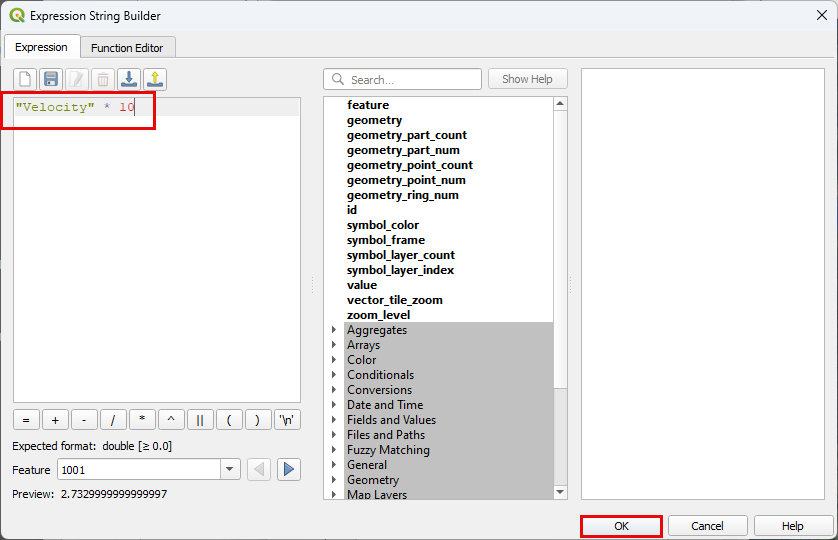
If the vectors are too short, edit the height to Velocity times a factor. This works well for Final Velocites.
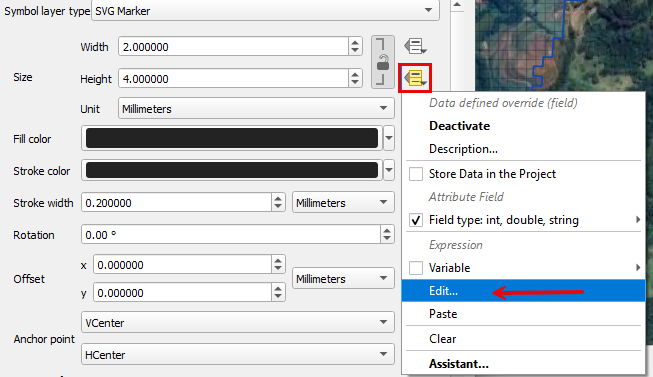
This editor can be used to set the vector lengthening factor.
Create Cross Section#
Use the editor widget to create the cross section.
Click the add floodplain cross section button.
Use the velocity vector map to find a good spot to place a floodplain cross section.
The vectors should be mostly crossing the line. Don’t pick a spot where the vectors are parallel or backward.
Digitize the cross section and Click OK.
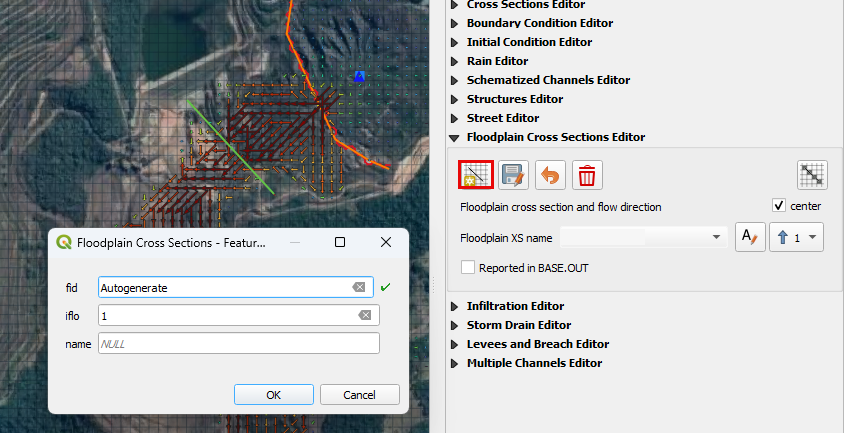
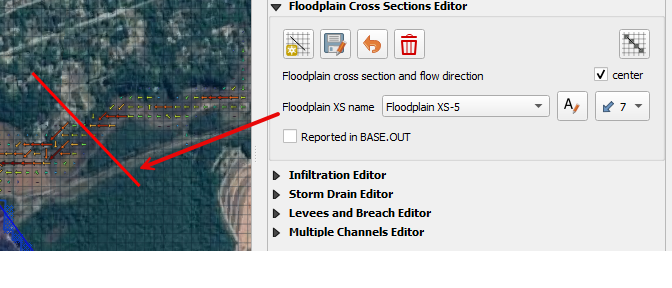
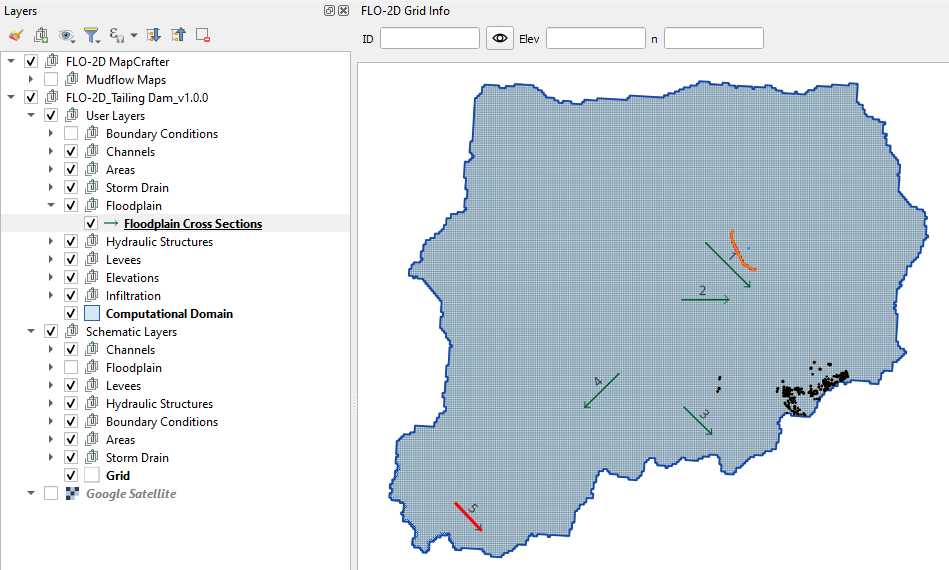
Click save to preserve the data. The user cross section is a green line.
A generic name is used if the name field is left NULL.

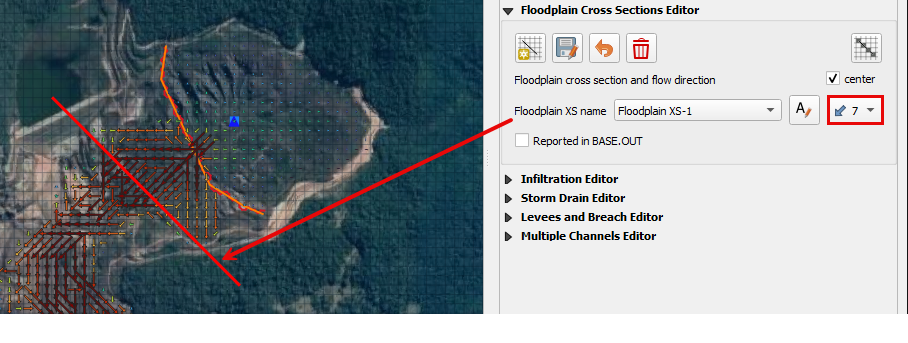
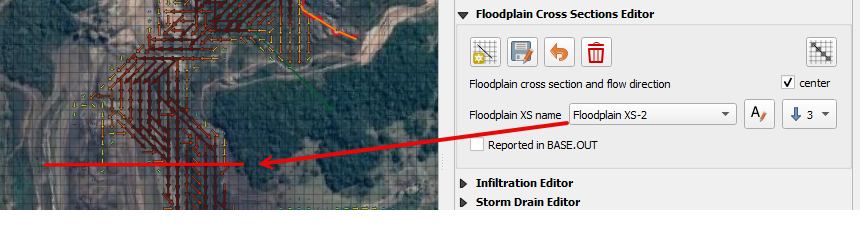
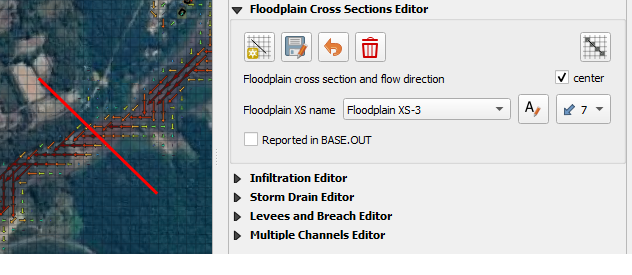
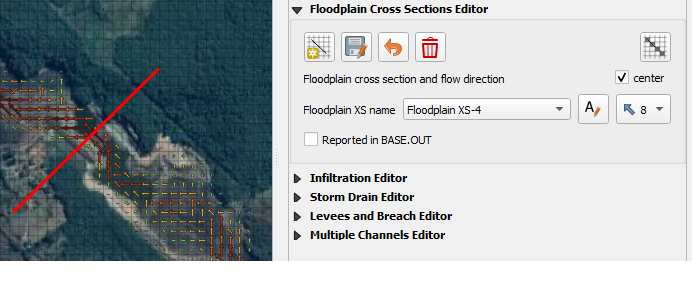
Set the flow direction for each cross section.
Floodplain XS-1
Floodplain XS-2
Floodplain XS-3
Floodplain XS-4
Floodplain XS-5
The final map looks like this:
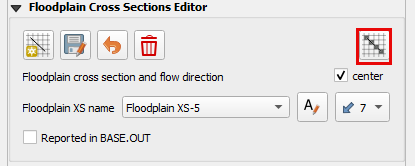
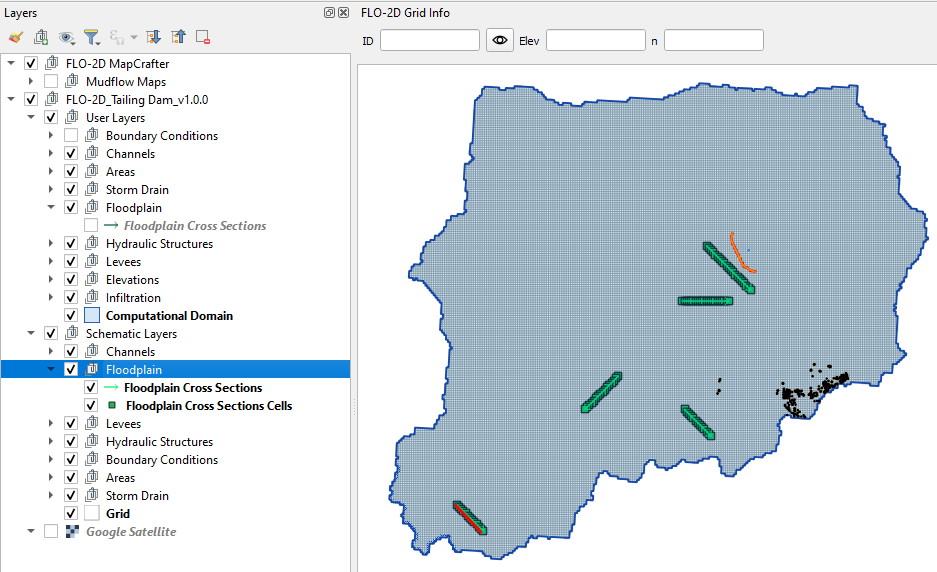
Click Schematize to save the data. The schematized cross section is corrected to meet the FLO-2D criteria for Floodplain cross sections.
The final schematic layers look like this:
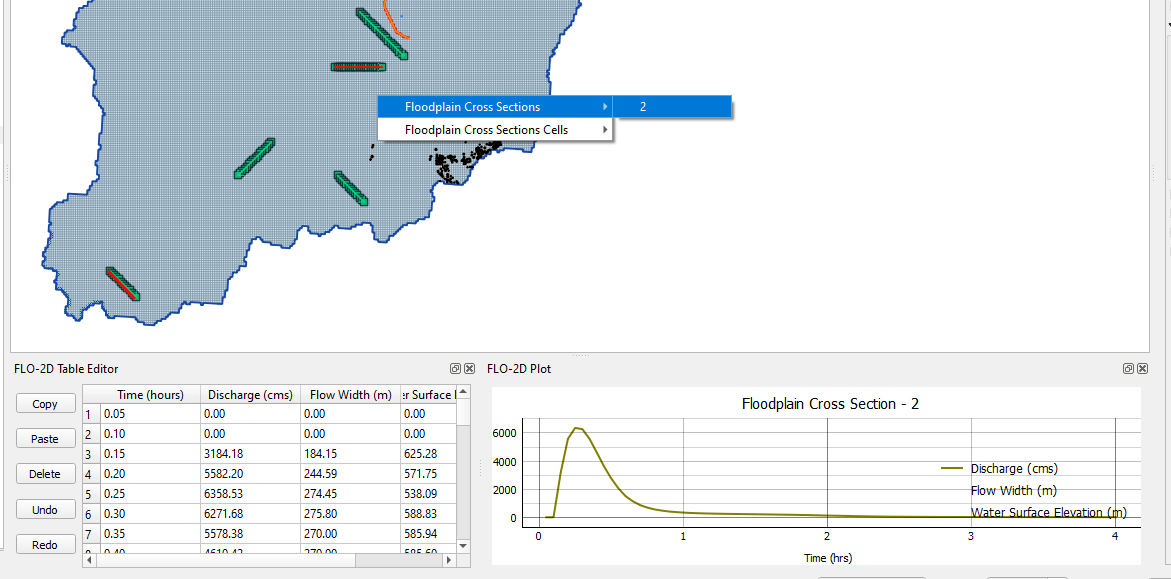
Export and run the model again so that the cross section results are written.
The results tool can be used to review the cross section results.
Troubleshooting#
Make sure the cross-section lines are within the grid system.
If copying cross section data into the layer, make sure the FID is numbered 1 to n number of cross sections.
Make sure the iflo is assigned to a number 1 – 8 that is a flow direction most perpendicular to the polyline.
Try to make the lines horizontal, vertical or diagonal to the grid elements. If the line is not very close to the grid alignment, the intersector may have trouble finding the correct alignment.
Use the Velocity Vectors from MapCrafter or the Mesh Time maps to help set up the line. Place the lines in a location where all flow crosses the line. Do not place the line where flow is parallel to the line.