
Computer set-up#
Overview
The Admin IT should set up the computer with these:
FLO-2D Setup.exe (subscribers)
FLO-2D Activator.exe (subscribers)
QGIS *.MSI installer (all users)
The end user can install these:
Get the FLO-2D Plugin (all users)
If you are not a subscriber, take the class using the FLO-2D_Demo software that is packaged inside the class installer.
This class was designed for FLO-2D Plugin 0.10.115.
Required Data
The required data is on the FLO-2D Flash Drive or if was installed with this document:
File |
Content |
|---|---|
*.zip |
FLO-2D Plugin xxx.zip |
*.pptx |
Presentation Files |
Note
It will be easier to view these videos on YouTube.
Set the video playback speed to 2x to complete the lessons faster.
Step 1: Set up QGIS#
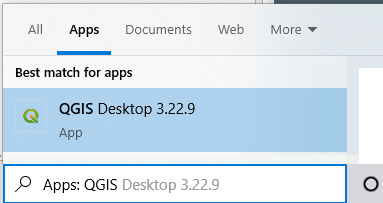
Open QGIS
Version 3.22.9 to 3.34.xx should work with this tutorial. Use the search bar or the desktop folder.
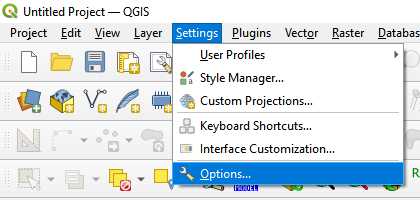
Open the Setting/Options menu.

Find the CRS tab and check the Use Project CRS button.
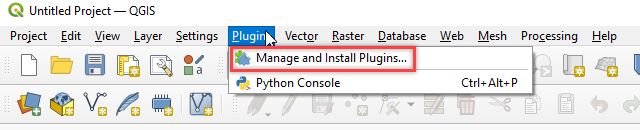
Step 2: Add plugins#
With QGIS installed it is time to add the FLO-2D plugin and a few other handy plugins.
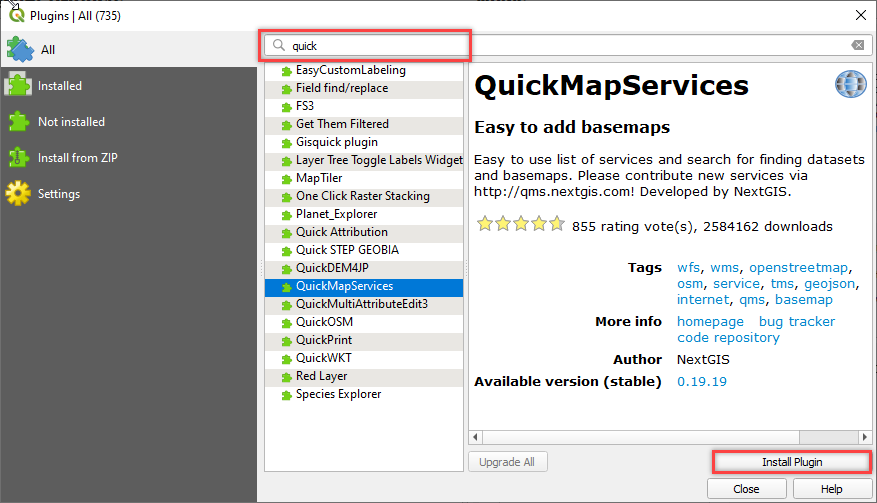
Navigate to the plugin manager.
Select All from the left side bar and use the filter to find and install the following:
QuickMapServices
Profile tool
FLO-2D Rasterizor
FLO-2D Map Crafter
Curve Number Generator
MapBiomas Collection
OSMDownloader
Serval

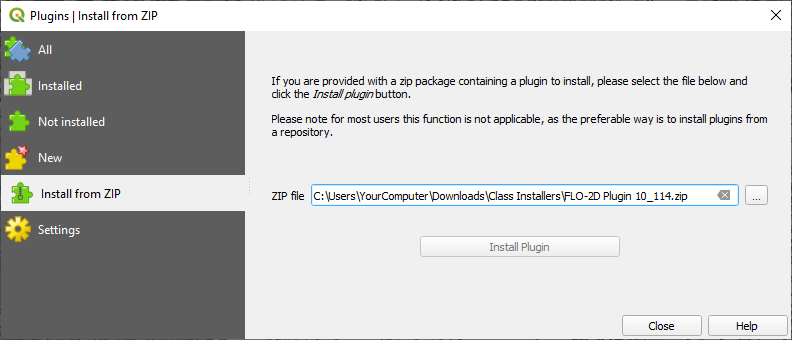
Install the FLO-2D Plugin 115. It should be in the class or download folder.
Close the window once the zipped installers are finished.
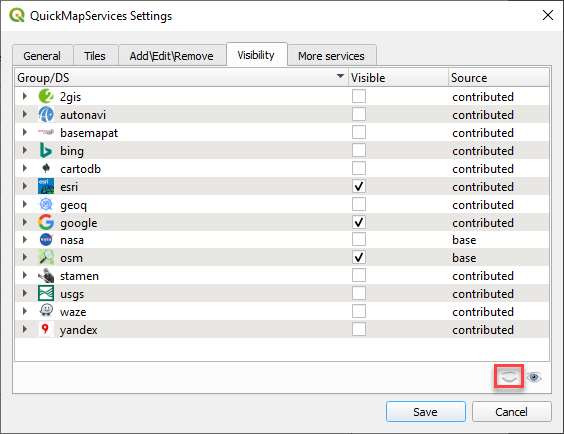
Click the Quick Map Services button and Click Settings.
Click Get contributed pack.
Change the tab to Visibility and hide all layers then check google, esri, and osm.
Step 3: Close QGIS to save profile#
Close QGIS to save the user profile to the computer.
If you skip this step and crash QGIS you will have to repeat this lesson.